I have a couple RM-35M Power supplies where the meter
lamps quit.
First one meter then shortly another.
Looking at one meter with lights and the other being dark finally got
the best of me.
I emailed Astron and inquired about purchasing replacement lamps. The
reply from Astron was quite shocking.
"Sorry, but the lights in the meters are not replaceable. The meter
must be replaced."
After being advised the lamps were not replaceable I was quite
irritated with Astron and their meter design.
Wondering just how long out of warranty I was, I went in
search of my
purchase receipt. I couldn't recall exactly when I purchased the
last two power supplies.
My order date exceeded one year by 3 weeks at the time I
tried to
purchase lamps from Astron. Both supplies were not placed in service
until 3 months after their purchase. Meaning meter lamps lasted
somewhere between 8 to 10 months.
I have had good luck with all my Astron Power Supplies
when it comes to
supplying power.
Being informed I would need to spend about $40 to fix the lights in 2
meters was more than I could swallow.
I decided to replace the meter lamps
with LED's.
What follows is my experience.
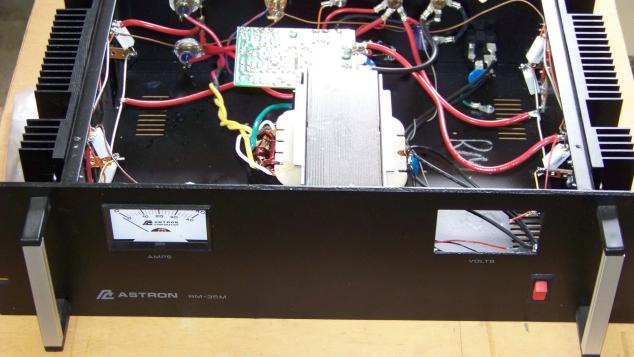
Off came the Power Supply cover and out
came the first meter.
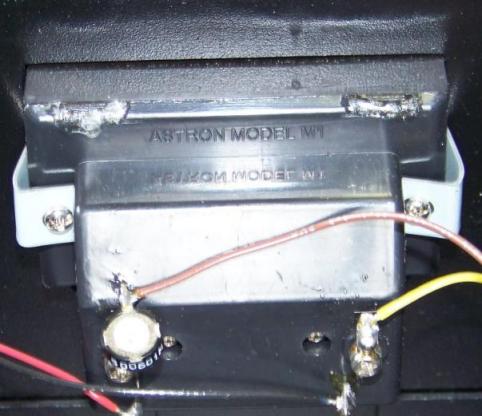
Meter housings are glued in a couple
areas mostly along the top.
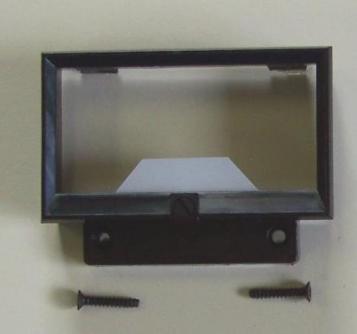
Once I removed the meter and
prior to removing the lower housing screws
I used dental picks and a razor blade to remove the glue and separate
the housing lip. Prying gently outward until I made certain the housing
would come apart once I removed the 2 lower screws holding the meter
front to the housing.
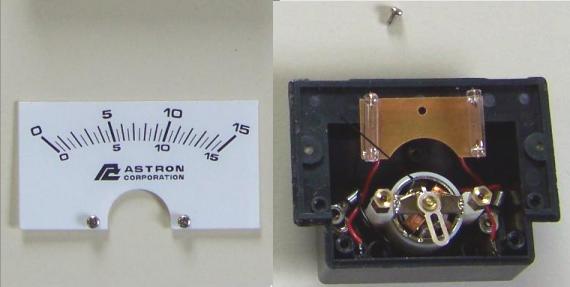
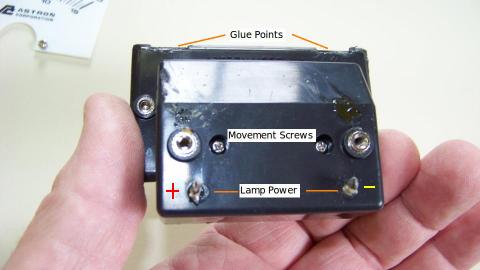
2 small screws hold the meter scale in
place. I removed the scale. Behind it I found 2 glass lamps (resembling
a small glass fuse) mounted on a circuit board.
A single screw holds the lamp circuit board to the rear of the meter
housing. The meter needle rests off to the left leaving room to slide
the circuit board upward and to the right rotating it free of the meter
movement.
Take care not to damage the meter needle while removing the circuit
board.
On the first meter repair I removed the
meter
movement from the housing for pictures and to decide how best to
replace the lamps.
I found that is unnecessary. The lamp circuit board is perfect for
mounting the LEDs. It contains a jumper between lamps and pads for all
solder connections.
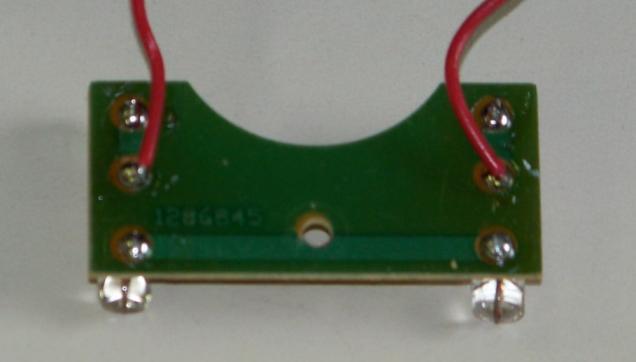
The lamp power leads are tack soldered
to the back
of the circuit board if you stand the board vertically as far as you
can the power leads will easily come free by touching each lead with a
small soldering iron. Be sure to mark the front of the circuit board
with the polarity of the incoming power leads.
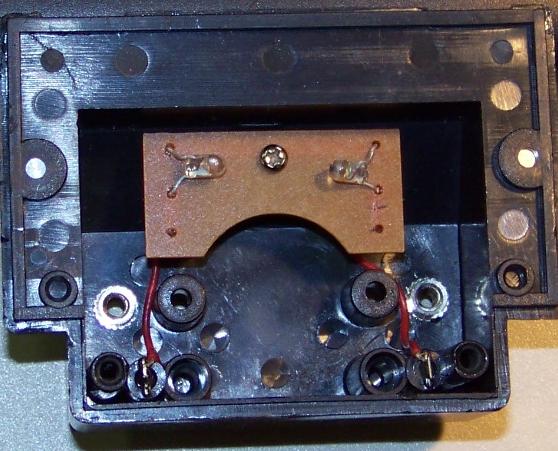
Once the leads are free the circuit
board can be
relocated for rebuilding without concern about damaging the meter
movement. I removed the two glass lamps from the circuit board and
replaced them with small (3mm) clear white LEDs.....
Note the 2 LEDs hooked in series and their polarity.
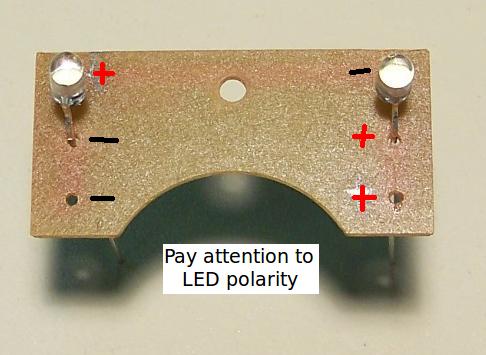
The LEDs I used are (Mouser P/N: 593-VAOL-3MWY4).
A high intensity, small clear white, 3mm LED costing $.36 ea.
LEDs have a focal point which is fairly
sharp at
close range. I bent each LED to shine across to opposite sides of the
meter scale (X fashion) to broaden the beam of light on the rear of the
meter scale.
I powered the meter from my variable
bench supply to test the look of the LEDs at different current levels.
I discovered the small LEDs have way more brightness than needed if
turned up.
I reassembled the meter in it's housing, placed it back in the Power
Supply.
A current limiting resister is mounted external of the meter housing to
allow tailoring the final brightness.
The original lamps contained NO markings of type, voltage or current rating.
When I went to reconnect the meter lighting power I discovered the previous meter lights were fed directly from the large filter capacitor with 29 Volts.
I moved the meter lighting power to the
13.8 Volt supply output.
With a 3300 ohm series resister, LED current is only 2.6 milliamp for a
meter brightness I liked.
Current much above 5 milliamp starts to over brighten the meter scale.
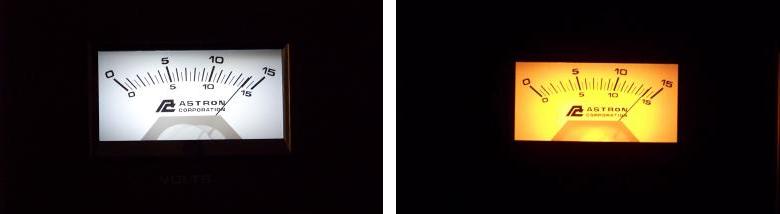
The ammeter on the left in the picture below was drawing 5 milliamp
during testing. Notice it is just beginning to blossom in the center.
I am happy with the outcome of the lamp replacement. Personally I
prefer the white meter lighting over the yellow of original Astron
lamps.
Being fair to Astron - A final note
After being told my meters would need to be replaced to repair the lamp
problem.
I did send a reply to Astron informing them I was afraid I would have
to pass on purchasing new meters as their meter prices were a bit steep
just to replace light bulbs.
About 2 weeks afterwards, I had already replaced meter lighting with
LEDs in my meters. I received another email from Astron telling me they
would send me 2 replacement lamps
and to please contact their service department for directions on how to
open the meters.
Once again... I have had great service from my Astron power supplies.
Meter design and how they deal with bad meter lamps could certainly
improve.
|